Sunday

BMW M1 Homage Concept - Futuristic Interpretation Outlook

The BMW M1 Homage Concept is a truly unique supercar. Because it is a BMW we are not surprised by the power that lies underneath the hood. What took us off guard was the design that was used. This design was much different then what we are used to - but in a positive way!
The M1 Homage design is pulled from familiar elements taken from the BMW Design. It would be too much if they were too stray too far from what consumers are used to - but at the same time they have added some new schemes to it. BMW has brought together designs from both the past and the present.

The unusual color is one of the most dominant design to the surface of the concept and is the first thing that draw our attention to it. The body itself is built with a few trademark proportions that have been created with exciting and new details and surfaces that give a more futuristic interpretation. The front end of the concept has been styled following many of the graphic design themes that are associated with the M1 Homage Concept. Each element of this front end has a purpose. A good example of this is the twin kidney - which is a common feature for the BMW brand - but also helps to combine aerodynamic, safety solutions, and cooling-air routing.
The headlamps are different and more unique. They are a new example of the retractable headlights of the M1.

They are just like the ones used on the classic M1 and can only be seen when they are turned on. When they are not being used they are integrated into the design on the front end and will disappear into the recessed black cutline. These are similar to pop-up headlights. There are two dramatic lines that run from the front of the concept along the flanks that lead to the area where the engine compartment is. The flow of lines start in a straight line at the front end and lower to the optical centre of gravity. This helps to bring to light the low slung stance of the supercar.
In the middle of the car the lines break apart. This design helps people to focus where the power of the car is - the engine. The strong and sensuous sweeping lines that help to accentuate the mid-engine of the car. This design helps to focus on the mechanics that were used as well as the engineering skills.

Review Ford F-150 - Feel The Smooth Ride

Many feel that it is not practical to purchase any type of SUV or truck during this time because the gas prices fluctuate from hot to cold so often and the economy seems to be taking a turn for the worst. Those who need a car have turned their attention from what is the nicest looking car to get to what is the most affordable, practical, and fuel efficient . SUV’s and trucks have been the most rejected because of this and automakers who make them have begun to feel the strain of unsold merchandise.

But this doesn’t stop Americans from purchasing the one truck they know will benefit them and even help those whose business is to lift and haul heavy items. The 2007 Ford F-150 is probably the most reliable truck on the market today. This entry line includes the full size pick-ups, Super Duty trucks, and the entry level F-Series truck. When you drive the truck around when the bed is empty then you will be able to feel the smooth ride and easy handling that makes it a great ride. When riding in the SuperCrew cab you can fit at five to six people comfortably and without anyone complaining. The extended cab has less room - but you are still able to fit a couple people.

The regular cabs are built with reverse opening doors that lead people to the bed of the truck.
While the ride is comfortable and smooth there is a downside to this truck. The engine is not what you would call top of the line and is not for the power hungry. The F-150 is equipped with a Triton 5.4 liter V8 engine that pushes out 300 horsepower and 365 pound foot of torque. What is impressive is the 10,500 pound tow rating. However, the truck is still much slower then much of its competition (Nissan Titan and Dodge Ram).

One of the main reasons for this is not just its engine - but mainly its curb weight. It is much heavier then other trucks on the market. Another issue that Ford needs to work with on newer models of the Ford F-150 is the four speed automatic transmission that it uses. Many automakers have changed to using five speed automatics because it helps to improve upon fuel economy and acceleration. But this is not something that can deter most people and it shouldn’t. Not everyone craves for a quick truck. In fact many consumers believe that it is one of the easiest trucks to drive on an everyday basis. It comes available in a wide range of body styles and equipment that will help to complete the use of your truck. It costs close to $14,000.

Saturday

Free Tips on How to Clean Your ABS Wheel Sensor - Get Better Braking System

Does your ABS light come on consistently and you do not know what is wrong! Well, when you check your code, you may see that it says that your front wheel sensor is damaged. However, that is not always the case. A lot of times, your ABS wheel sensor is just fine; they just need to be cleaned. Of course, if you take it to a shop, they are going to tell you that you need a new one. So we are going to go over how you can clean your own ABS wheel sensor in your Toyota and save yourself a lot of money. After you clean it, if you are still having the problem, you will need a new one. However, most people have noted that nine times out of ten, this does indeed fix their problem.
First of all, before you get started, you are going to want to make sure you have everything that you need to perform the job. The only things that you are really going to need are a ratchet, jack, wheel lock and, of course, a rag or paper towel to clean it off with. After you have all of this stuff, you can feel free to get started. This should only take you an hour or two to do yourself.


Getting Started On Your Wheel Sensor
First, you have to choose which side you want to get started on. You can choose either the passenger side or the driver side; it does not really matter. However, whichever side you do choose, that is the side that you, of course, need to jack up first. Before you jack up the car, you need to turn the steering wheel to the opposite side that you are working on. For example, if you are working on the driver side, then you are going to want to turn the wheel to the passenger side. Also, when you get it jacked up. You should use a jack stand, not just the jack. You never know how long you will need to have this car jacked up, so you will want the jack stand.
After you turn the wheel and get everything all set up, you will notice that you should be able to locate the ABS wheel sensor very easily. It should be located directly mounted to the knuckle. To take this off, you are going to have to remove the two bolts that are holding them in place. In most Toyota cars, they are 10mm bolts. However, some of them can change from time to time. Overall, there will be about four bolts you have to take out. To do this, just follow the ABS sensor around so that you can remove all of the bolts. When you get the sensor off, you will notice that it is all covered in dirt. Take your rag or paper towel, and start whipping it off. As you do, you will notice that the very middle of it has a sliver strip that you could not see before. A lot of times, dirt blocks this and can cause problems, as you found out. After cleaning it, simply reverse the steps you did to reinstall it. Also, be sure to check both of the front ABS sensors. The one on both sides of the car!
Still Having Problems
Most of the time the procedure discussed above will fix any problem that you are having with your ABS sensor. If you have cleaned both of the front sensors and there are still problems, then you do have a damaged ABS sensor. At this point, you need to get new ones and replace them. If you want, you will be able to install them the same way you cleaned the other ones. However, instead of cleaning the old ones and putting them back on, you can simply put on the new ones. Overall, this is a one day job that can save you a ton of money. Most people do not notice how much money that they can save by doing this themselves until they actually do it!

Free Guides on Brakes Shake - Machine the Rotors Or Replace Them?

If the steering wheel shakes when the brakes are applied, the brake rotors most likely have excessive side to side run-out or they are more commonly known as being warped. Auto techs call this brake shake or brake pulsation. Brake rotors being warped is not a dangerous condition by itself, but it can be very annoying. The brake pads may not need to be replaced, but if they are more than half worn it would be a good time to consider replacing them. Most shops will check brakes for free, it's best to make sure they use a micrometer to measure the thickness of the rotors to verify if they are legally able to be machined (also known as turned or resurfaced).
Replace or not.


Many vehicles today have very thin rotors from the factory, depending on the thickness there may not be an option to machine them. Many replacement rotors are low priced depending on the make and model of the vehicle. It may be a good idea to replace the rotors if the replacements are priced well, instead of machining the old ones. After machining the rotors they are physically thinner and more susceptible to being warped again. In the past I owned a vehicle that warped rotors frequently. I would machine them myself using the brake lathe at the shop I worked at and the rotors would warp again in about six months time. I finally bought some aftermarket replacement rotors for around $30 a piece and put those on and never had anymore pulsation problems.
Types of Brake Lathes. There are two types of brake lathes. There is the conventional brake lathe that the technician uses to machine the rotor off the vehicle. And there is the on the car brake lathe used to machine the brake rotor on the vehicle. The best way to machine brake rotors is on the car. The reason is because of the possibility of other components having run-out. When rotors are machined on the car, any run-out in the wheel hub is compensated for. The result is a much better cut that allows the rotor to be machined much more precisely. Rotors that are machined on the vehicle have less re-occurrences of being warped as quickly when compared to rotors being machined off the vehicle. So if possible consumers should opt to find a repair shop that has the capability to machine rotors on the car if needed. Auto repair shops that have on the car brake lathes realize the importance of having the right auto tools and equipment to service their customer's cars properly.

Free Car Top 10 Checklist - Avoid Breakdown

Every year the motorist is faced with the ordeal of the MOT test, unless their car is less than three years old. The purpose of an MOT is to ensure the vehicle complies with road safety and environmental standards. Without it car owners are unable to obtain a tax disc for driving on public roads.
But what does the MOT tester look out for? Is it car tyres or fuel emissions? It can become expensive when the vehicle fails and needs to be re-tested. To help achieve a first time pass, this 10 point checklist highlights the main components that are included in an MOT test:

1. Brakes
The car's brakes are tested on a 'roller brake tester' to assess their condition, performance and efficiency. Brakes that 'lock up' when applied will fail. Other areas to watch out for are loose brake pedals and signs of leaking brake fluid.
2. Doors and Mirrors
Ensure the doors open and close correctly, from the inside and the outside of the vehicle. Car locks need to work adequately. Wing and rear view mirrors must be present and in good condition. A cracked wing mirror will result in a fail.
3. Exhaust System and Emissions
The car will need to pass specific exhaust emission requirements, depending on its age and fuel type. The exhaust system must not have holes or leaks, often caused by rust.
4. Car Bodywork
Excessive rust corrosion, damage or sharp edges on the car's bodywork will result in a fail.
5. Wheels and Car Tyres
The tread depth on a car tyre must be a minimum of 1.6mm. The car tyre needs to be the correct type for the vehicle and have no signs of excessive wear or damage. It is recommended to consult a car tyres specialist to check this. Ensure all the wheel nuts are present as any missing will result in a fail. Spare tyres are not tested.
6. Windscreen, Wipers and Washer
The wiper blades need to be in good condition and the windscreen washer must contain fluid. The windscreen cannot have any large cracks and must have clear visibility.
7. Lights and Indicators
All lights and indicators need to work correctly, including the hazard lights. Check that the headlamps dip to the correct angle and are not loose.
8. Seats and seatbelts
Ensure all seats are secure in the upright position. It is compulsory for seatbelts to be fitted in the front and back of a car. They must be the correct type and in good, working condition.
9. Steering, suspension and horn
All three need to be in good condition and work correctly. Make sure the horn is the right type for the vehicle. Ensure the wheels are correctly aligned and the car tyre pressures are correct, as these can affect the vehicle's steering.
10. Registration Plate and Vehicle Identification Number
The registration plate needs to be in the correct format, legible and in good condition. Every car used after the 1st August 1980 must have its vehicle identification number clearly displayed.
Lights, brakes, suspension and car tyres are the four most common reasons why a car will fail its MOT. This checklist is intended as a guide to improve your cars chance of passing. If in any doubt we recommend consulting your local garage before taking the MOT test.

Free Tips on How to Replace Brake Pads

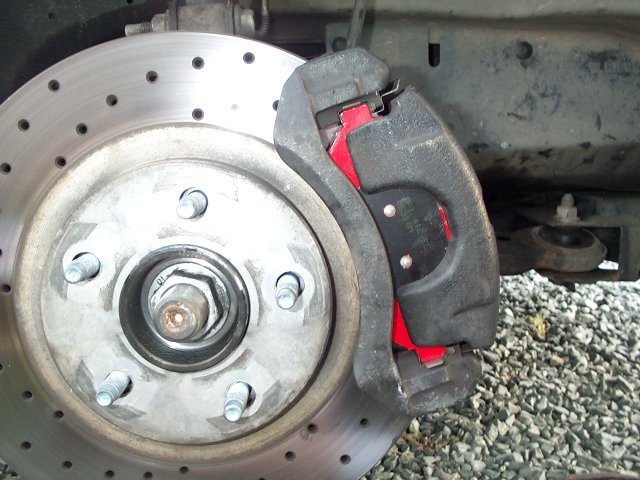
Brake pads naturally wear out over time. Luckily, it is not as difficult to replace them as you may think. The tools that you need for this project include a lug wrench, c-clamp, adjustable or open wrench, Allen wrenches, hammer, and a bungee cord. When you jack up your car, make sure that you have it supported by blocks or jack stands. It is never safe to work on a car that is supported by a jack only. The first thing you need to do is remove the wheel. The lugs should be easy to take out, it is best to do so from the bottom up.

Next, in order to remove the brake pads you must first remove the brake caliper. The brake caliper can be located just above the lug bolts, sitting on top of the brake disc. There is a bolt that keeps the caliper in place. You can remove it easily using the suitable wrench. There are different types of bolts that could be keeping it in place, so it is a good idea to have different wrenches handy. Now you can pull the caliper off by pulling directly up. You may need to wiggle it a bit in order to loosen it. Now you can sit the caliper some place convenient, or use your bungee cord to tie it up.
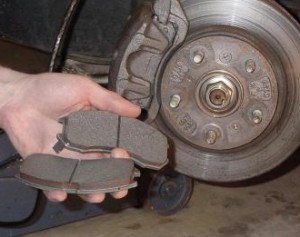
Now comes the time to remove the brake pads. They should actually slide right out without giving you any trouble. Remember how they are attached though, because you will need to know this when you are installing the fresh ones. If you are driving an older vehicle, you may need to tap them with your hammer a bit to get them unstuck. There may be some small metal tabs keeping the pads in place as well. If so, make sure you hang onto them; you will need them when you put the new pads in.
Now you can easily slide your new brake pads in, using the metal tabs to keep them in place if applicable. Now with your new pads affixed, you should adjust the brake piston. This piece of equipment adjusts as your pads wear out in order to keep your brakes working efficiently. To readjust it, you need your c-clamp. Put the end of the clamp with the screw against the piston. The other end should rest behind the caliper assembly. Now just slowly tighten the clamp until the piston has moved to a point where you can insert the pads easily.
The next thing you need to do is slide the caliper assembly over your new pads. Replace the bolts. At this point, it is a good idea to push down the brake petal a few times so that you may be assured of your brake pressure. Now you can replace the wheel and the lug nuts. It is a good idea to make sure that the lug nuts are truly secure. At this point you have successfully changed the brake pads on your car.